Showing posts with label paper projects. Show all posts

Tuesday, January 1, 2013

Paper Globe Ornaments or Bowl Fillers


What fun to make, and EASY!  Follow these simple step-by-step directions to create your own paper globe ornaments or bowl fillers.  I adore the mini version!
You Will Need:
*two-sided scrapbook paper
**regular or mini sized scrapbooking brads
paper cutter
small hole punch (I used 1/8")

*I buy an abundance of two-sided scrapbook paper each season.  Mine are all purchased at Michael's.  The two brands I have found most often are K&Company (28 sheet, 12 x 12" pads) and Recollections Signature (24 sheet, 6" x 6" pads).  See photo below.
**I used Spare Parts by the Paper Studio brads (50 round brads, assorted metallics) and Making Memories brads (metallic basics, mini circle #23539).

How to Make:
1. Cut 3/8" strips of paper.  The number of strips will depend on the size of globe you choose to make. 
Size Guidelines: 
Mini (as shown in photo on hanging on tree) -- 8, 3/8" x 3 1/2" strips
Small -- 10, 3/8" x 4" strips
Medium -- 12, 3/8" x 5" strips
Large -- 12, 3/8" x 6" strips
2. Punch a hole in each end of the stips.  Make sure to punch holes in the same place.  I stacked 4 strips at a time and used one as a guide for all others.
3. Stack strips so designs alternate.

4. Place a brad in each end making sure to pass through all strips. Affix tightly, as this will help strips to stay in place once "fanned" out to make globe.
5.  Slightly bend stack as shown.  Do not fold. This simply helps to form the spherical shape as strips are "fanned" out.
6.  Carefully "fan" out strips into desired positions forming a sphere/globe.
 
7.  Use as bowl fillers or make a hanger with plastic threads or fish line.  I simply tied plastic thread around/under the brad and knotted the ends to make a loop for hanging.
With the wide selection of two-sided paper colors and designs, you are sure to find those that will match your taste and decorating needs. 

Saturday, December 15, 2012

Pinwheel Christmas Card


Well, I debated whether to stamp our Christmas cards this year... I could not seem to figure out what I wanted to do, as far as stamping goes, when I remembered the neat pinwheels that I have my students make on the front of a special gift for their parents.  I decided to use the same idea for a Christmas card.  I must say, after making 40 cards, I had had my fill--BUT I love how they turned out...


You Will Need:
8.5" x 11" scrapbook paper of choice (to use as card)
scrapbook paper of choice (to use for making pinwheel and ribbon)
large brads in choice of finish
paper cutter
small paper punch (with large lead)
straight edge or ruler
pencil
permanent adhesive

How to Make:
1.  Cut scrapbook paper for card 4.25" x 5.5" (simply cut 8.5" x 11" sheets in half). I actually found kraft colored pre-cut cards and envelopes (pack of 50) by Paper Studios at Hobby Lobby, so I was able to skip this step. :0)

2. Score and fold cards, or simply fold cards.

3. Cut 2.5" x 2.5" squares of pinwheel paper.  Cut as many as desired depending on the number of cards you are making. The kraft Christmas paper shown was purhased at Hobby Lobby (by Paper Studios).

4. Cut "ribbon" strips of paper in desired width. My strips were about 5/8".

5.  Using straight edge or ruler, draw a pencil diagonal from corner to corner on the back-side of each 2.5" square (see photo).


6. Using scissors, cut on each diagonal (toward the center) WITHOUT cutting to the center--approximately 1/4" from center (see photo).


7.  With design side facing up, fold every other corner to the center (see photos). If using two sided scrapbook paper, make sure to have the design you want to see most facing up. Then affix each folded tab with adhesive.  This will create the pinwheel. 


8.  Affix, "ribbon" strips on front of card in desired place and trim excess (see photo).
 
9.  Affix pinwheel on top of ribbon at desired angle.

10.  Puch a hole in the center of pinwheel (see photo). 


11. Attach brad in center.


12.  Stamp or write sentiment inside.  Note:  If printing a sentiment with printer, feed cards through printer BEFORE affixing ribbon and pinwheel.

Make one, a few, or many! Enjoy!


Friday, December 14, 2012

Paper Folding: Star/Wreath Ornament


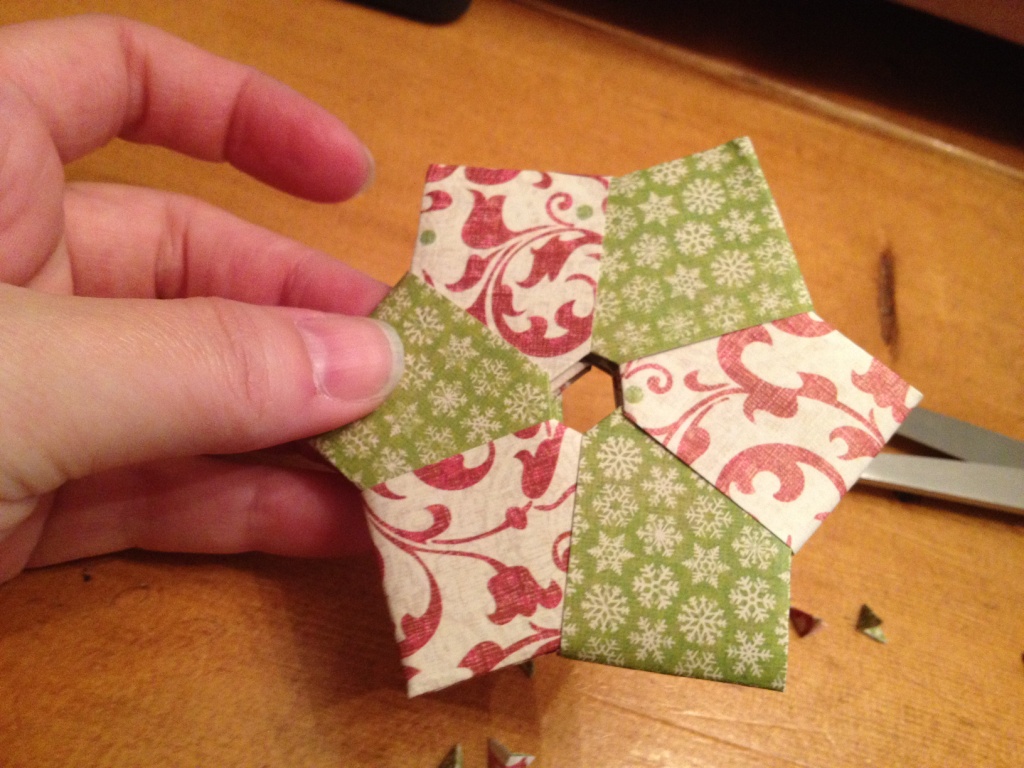
These folded paper stars/wreaths turn out wonderful!  I had great fun last weekend making some for my grandson (for gifts) after he picked out the paper combinations.  Great to hang on the tree, tie on a gift, use as bowl fillers, etc.!


You Will Need:

two scrapbook papers of complementing design/color
paper cutter
scissors
thin jute or string for hanging

How to Make:
1. Cut scrapbook paper into 6, 2.5" x 5" pieces (3 of each design/color).

2. Fold each piece in half lengthwise, with design/color facing out (see photo).

 
3. Open each piece, flatten with design/color side face-down, and fold in each corner to "meet" the fold (see photo).

 
4.  Refold on lengthwise fold (see photo).

 
5.  Fold each piece in half with pointed tips meeting (see photo).

 
6.  Holding on the fold, snip off each tip (see photo).

 
7.  Assemble star by following each step as shown in the photos below.  Make sure to hold pieces as demonstrated.


8.  Cut a piece of jute, match up the ends, and feed the loop through the center of star/wreath (see photo). 

 
9.  Feed ends of jute through loop and pull taut.  Knot at the top.


I love making these!  Choose paper to fit your style--the combinations are many!